
Save, Preview, Publish, and Unpublish Pages
💾 Saving
- In the top-left corner of the page editor, you can check the status label to confirm if page changes have been saved or view the last saved time.
- In the top-right corner of the page editor, click the "Save" or "Save & Publish" button to save the current page content:
- For unpublished pages: Simply saves the content.
- For published pages: This acts as "Save & Re-publish," and it will take approximately 10 minutes for changes to reflect on the website.
- In the top-right corner of the page editor, click the Settings (gear icon) to open the menu and toggle the "Auto-save" function. Once enabled, changes will be saved automatically 60 seconds after each editing session ends.
👁️ Previewing
-
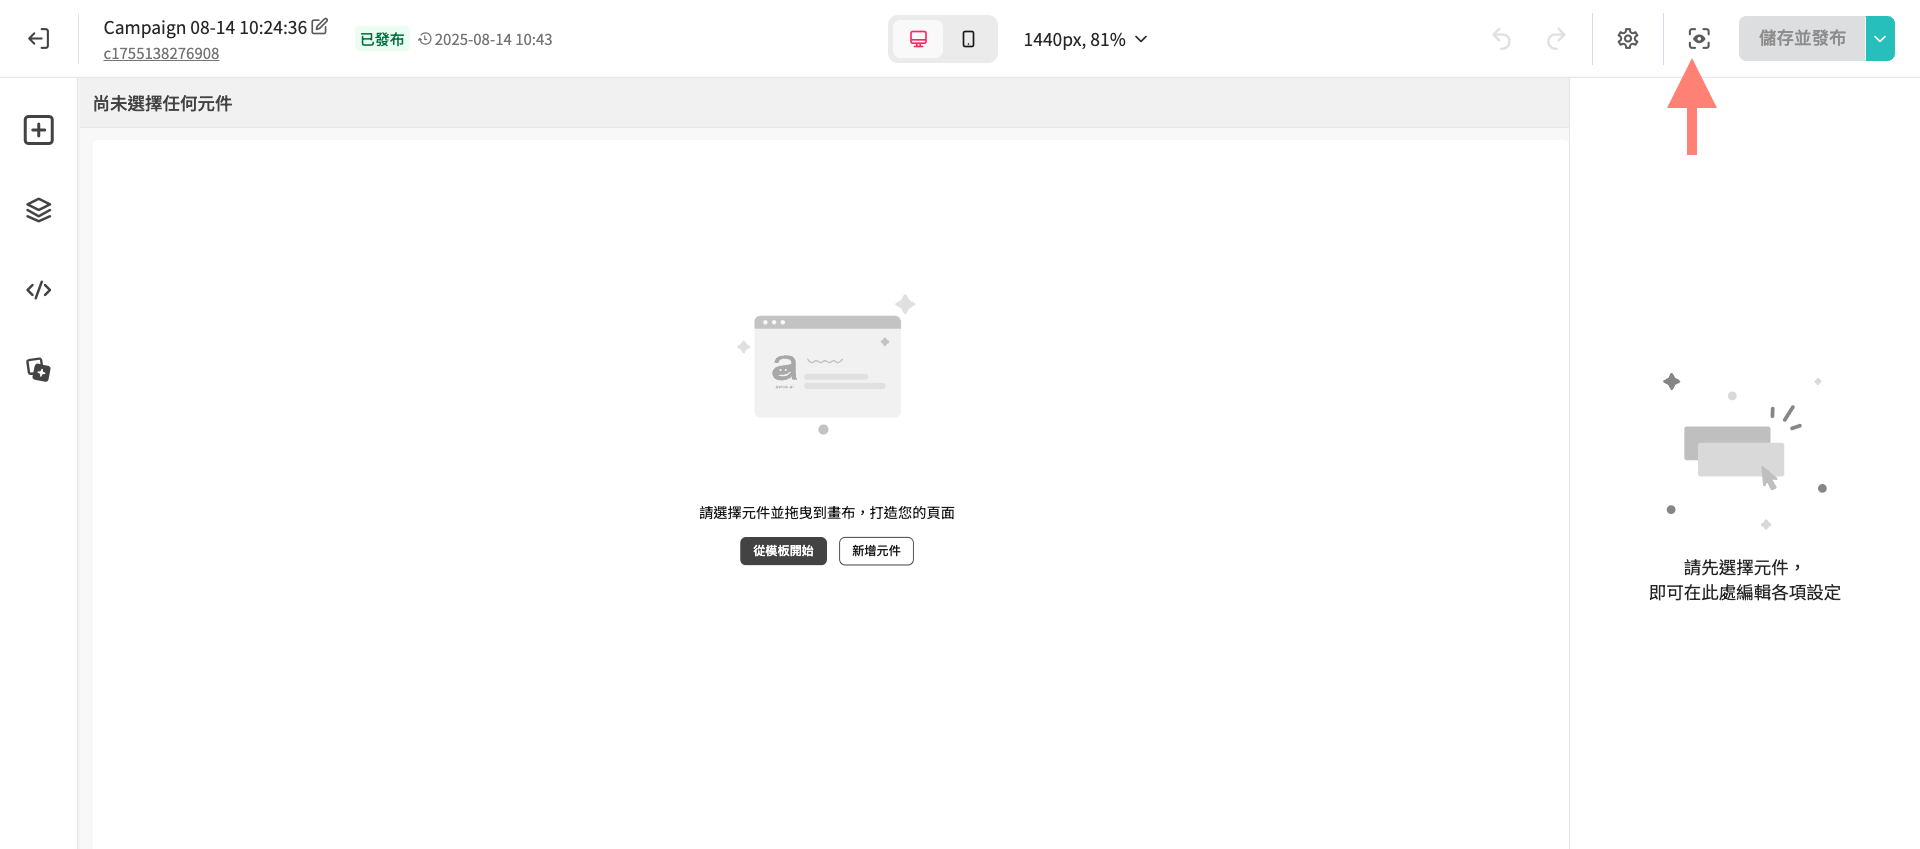
In the top-right corner of the page editor, click the eye icon to open a new tab and preview the current editing results in real-time on the website. This action will not publish the content to the live site.
-
Preview links are valid for 24 hours.
▶️ Publishing
-
In the top-right corner of the page editor, click the "Publish" or "Save & Publish" button, or click the triangle "Play" button in the campaign management list to officially publish the campaign page. Changes will take approximately 10 minutes to reflect on the website.
-
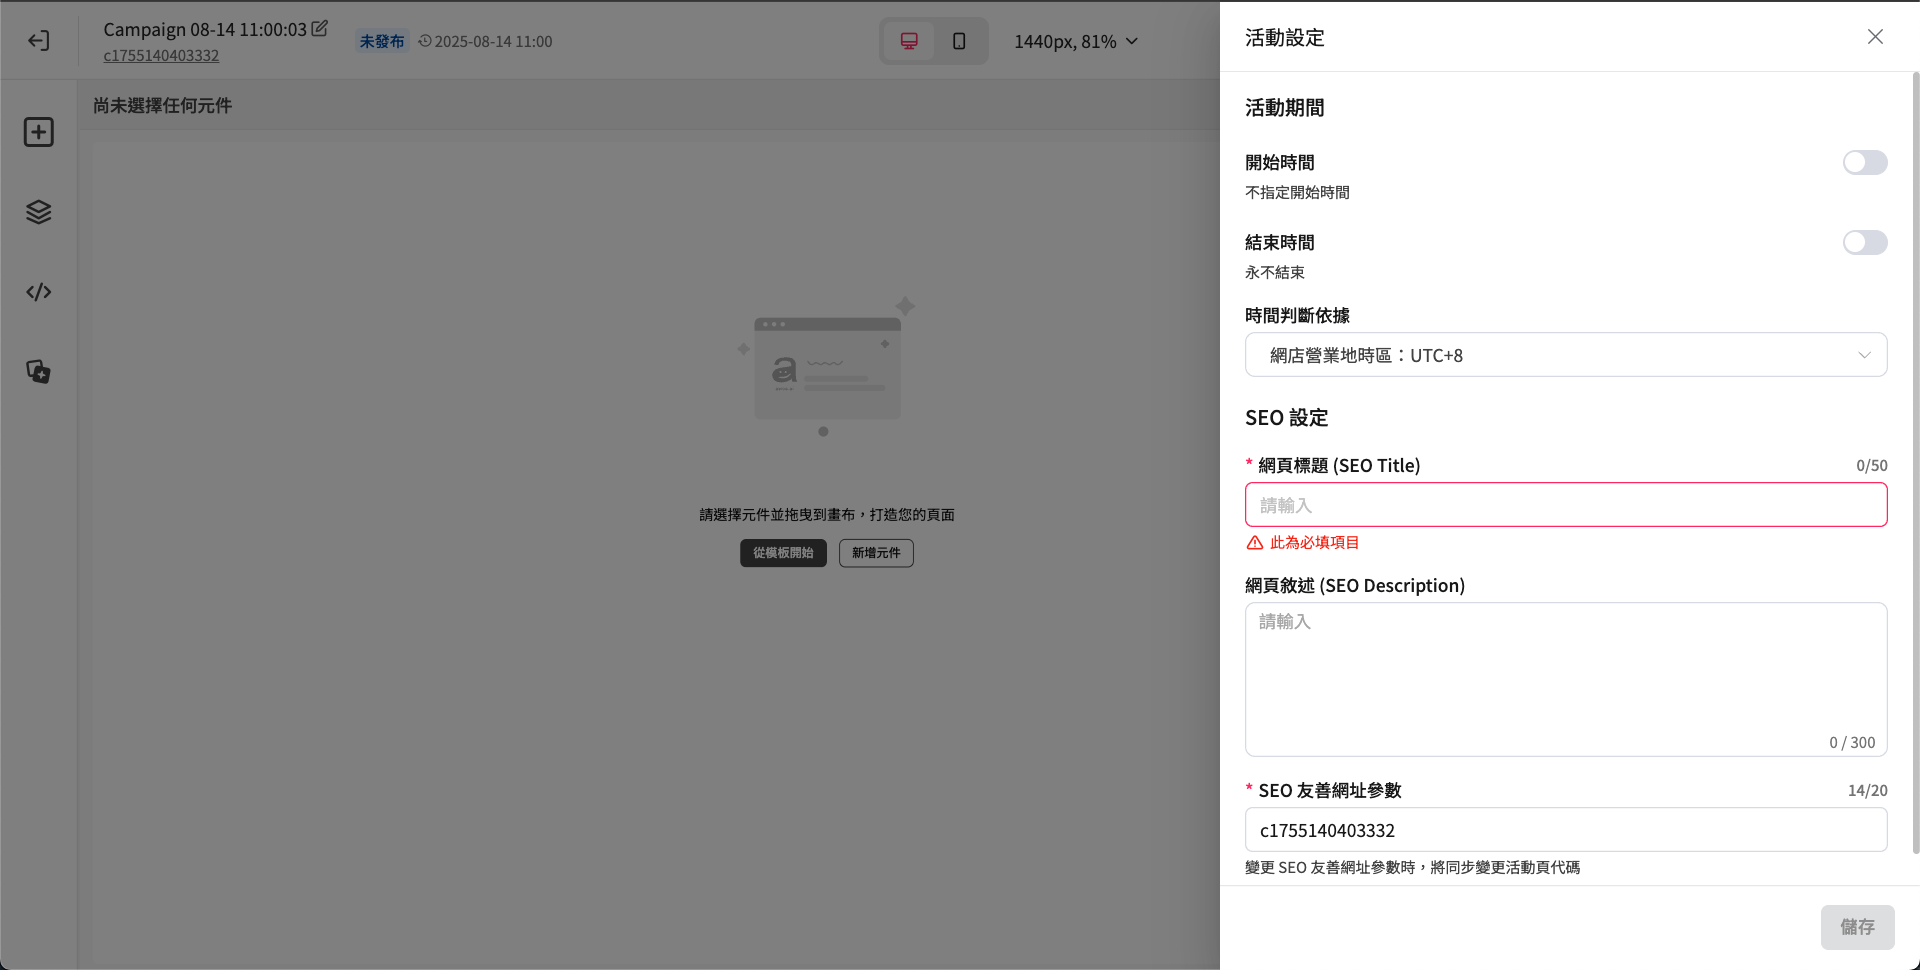
Before publishing the page, please ensure that you have configured the SEO Title:
🗓️ Scheduling
Scheduling can be configured both before and after a page is published.
- How to Access:
-
In the top-right corner of the page editor, click the Settings (gear icon) to expand the menu and select "Campaign Settings";
Alternatively, find the target page in the campaign management list, click the "︙" menu under the "Actions" column, and select "Set Schedule."
-
Once in "Campaign Settings," locate the "Campaign Period" section.
-
- If you want the campaign to start automatically in the future, enable the "Start Time" setting and specify the desired date and time.
- If you want the campaign to end automatically in the future, enable the "End Time" setting and specify the desired date and time. If this setting is turned off, the campaign will continue until it is manually taken offline.
- Choosing a "Time Basis":
- Store's Business Location Time Zone (Default):
- The system will use a fixed time zone to determine if the specified time has been reached.
- For example, if a campaign is set to start at 22:00 and the store's time zone is UTC+8, both visitors in Japan (UTC+9) and Taiwan (UTC+8) will see the campaign page at the same moment (22:00 UTC+8).
- Best for global launches to create a sense of shared excitement and scarcity among all consumers.
- Visitor's Local Time Zone:
- The system will use the time zone of the visitor's browser to determine if the specified time has been reached.
- For example, if a campaign is set to start at 22:00, visitors in Japan (UTC+9) will see the campaign page one hour earlier than those in Taiwan (UTC+8).
- Best for local promotions tailored to the daily rhythms of regional consumers.
- Store's Business Location Time Zone (Default):
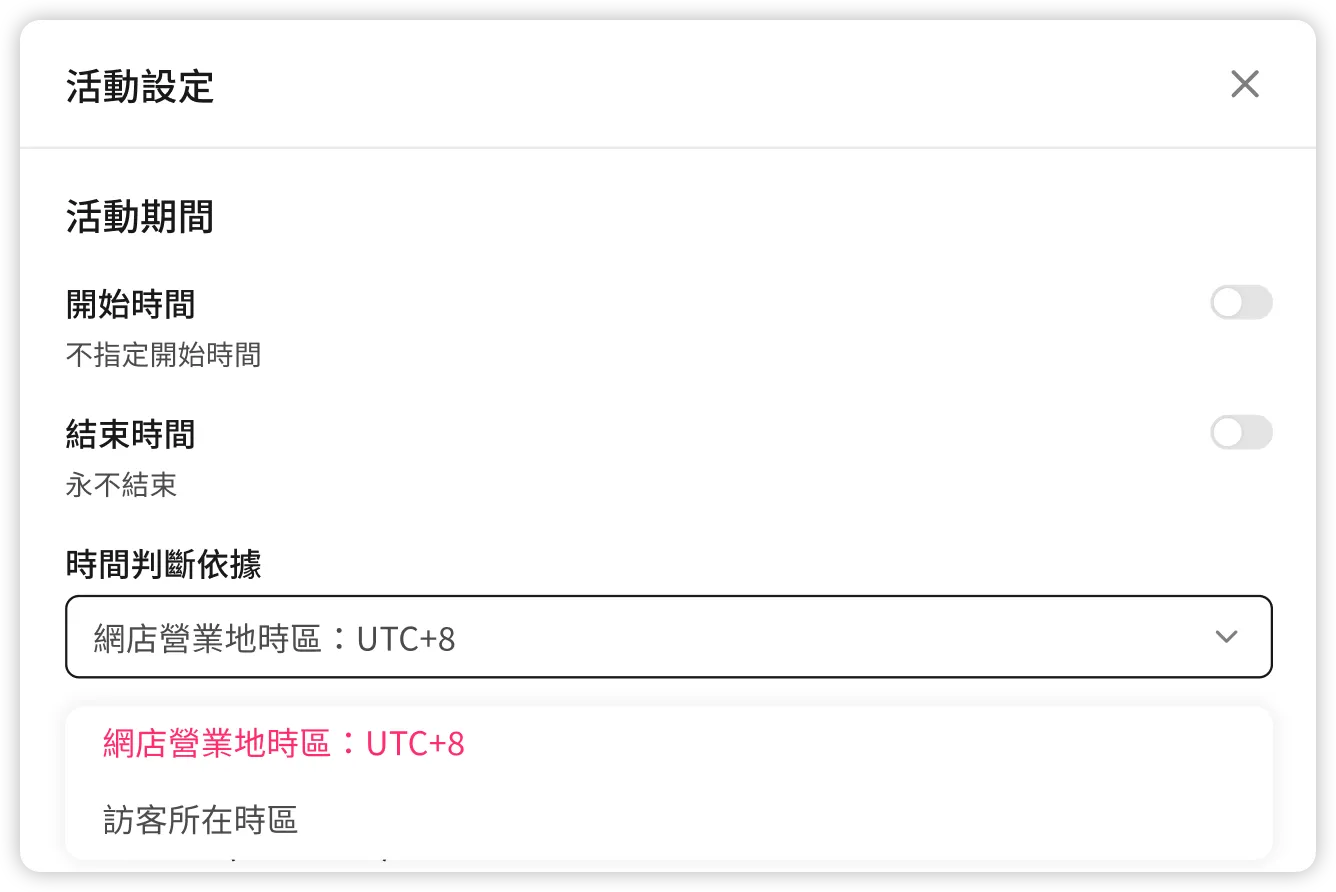
Under "Campaign Settings," in addition to the start and end times, you can also configure the page's SEO Title and SEO Description.
⛔️ Taking Offline
- If you have specified an end time via the "Scheduling" feature, the campaign will automatically go offline upon expiration without manual intervention.
- To manually take a campaign offline, click the down arrow next to the "Publish" button in the top-right corner of the editor and select "Take Offline", or click the "Stop" button in the campaign management list. The page will be officially taken offline, and the change will reflect on the website in approximately 10 minutes.
Important Notes Before Taking Offline:
Once a campaign is taken offline, it terminates immediately and will not temporarily return to "Draft" status.
After a campaign is taken offline, canvas content and page settings (e.g., campaign page URL) can no longer be edited.
Therefore, unless the page is completely deleted after the campaign ends, the same Campaign Code cannot be reused for new campaign pages. If you need to continue using the same Campaign Code, please edit the code before taking the page offline.
Updated 8 months ago