
CSS 編輯器和常用語法
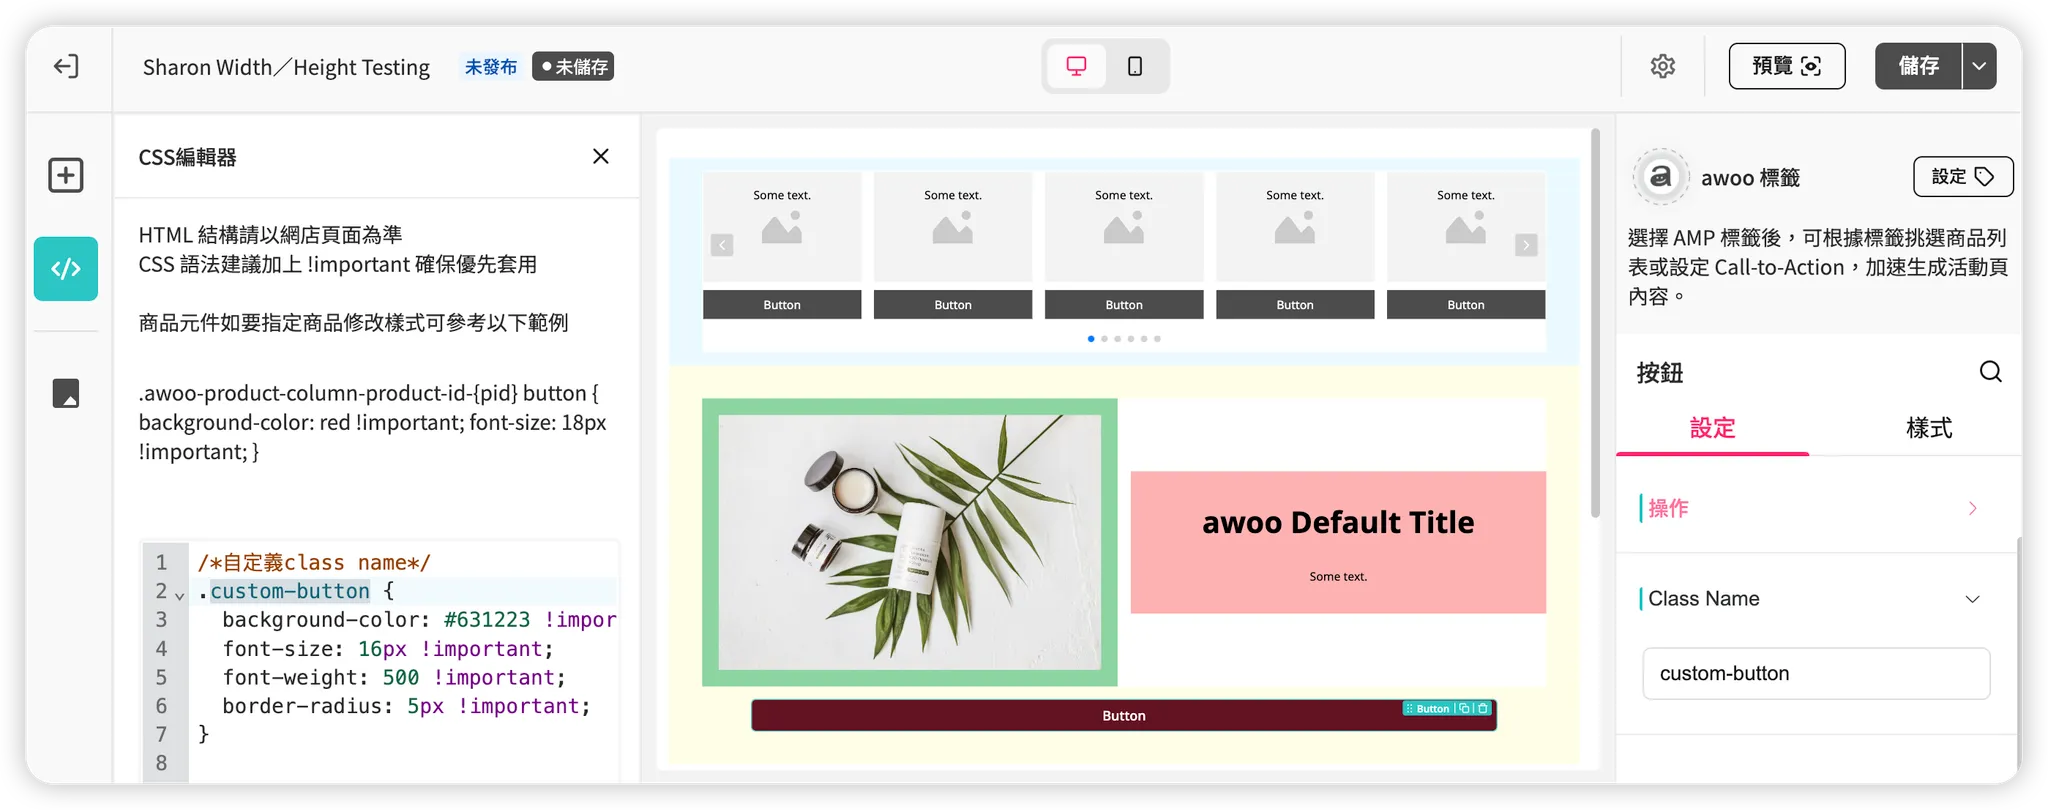
每一個活動頁面有獨立的 CSS 編輯器,可自訂這一頁的進階樣式。
🚪 入口
從活動管理列表進到某一個活動頁面的頁面編輯器後,從左側欄的工具列叫出。
🛠️ 使用方法
- 以 SDK 網店頁面的 HTML 結構為準,請勿參考後台編輯器的預覽畫布的 HTML🚫
- CSS class name 指定:
- 可在後台編輯器的右側元件設定面板的「class name」裡自行指定
- 若要設定 Product list 元件裡的特定商品,需使用系統指定的 class name:
awoo-product-column-product-id-{pid}
- 當同一個元件(class name)在 CSS 編輯器的樣式設定值,和在右側元件設定面板的樣式設定值不同,前端將以 CSS 編輯器的設定值 為準呈現
- 範例 CSS Code:
/*custom class name*/
.custom-button {
  background-color: #631223 !important;
  font-size: 16px !important;
  font-weight: 500 !important;
  border-radius: 5px !important;
}

/*specific pid in product list*/
.awoo-product-column-product-id-NF0A5J5NHCZ button {
  background-color: red !important;
  font-size: 18px !important;
}
.awoo-product-column-product-id-NF0A5J5NHCZ h5 {
  color: blue !important;
  font-size: 18px !important;
}
💡 常見的 CSS 語法
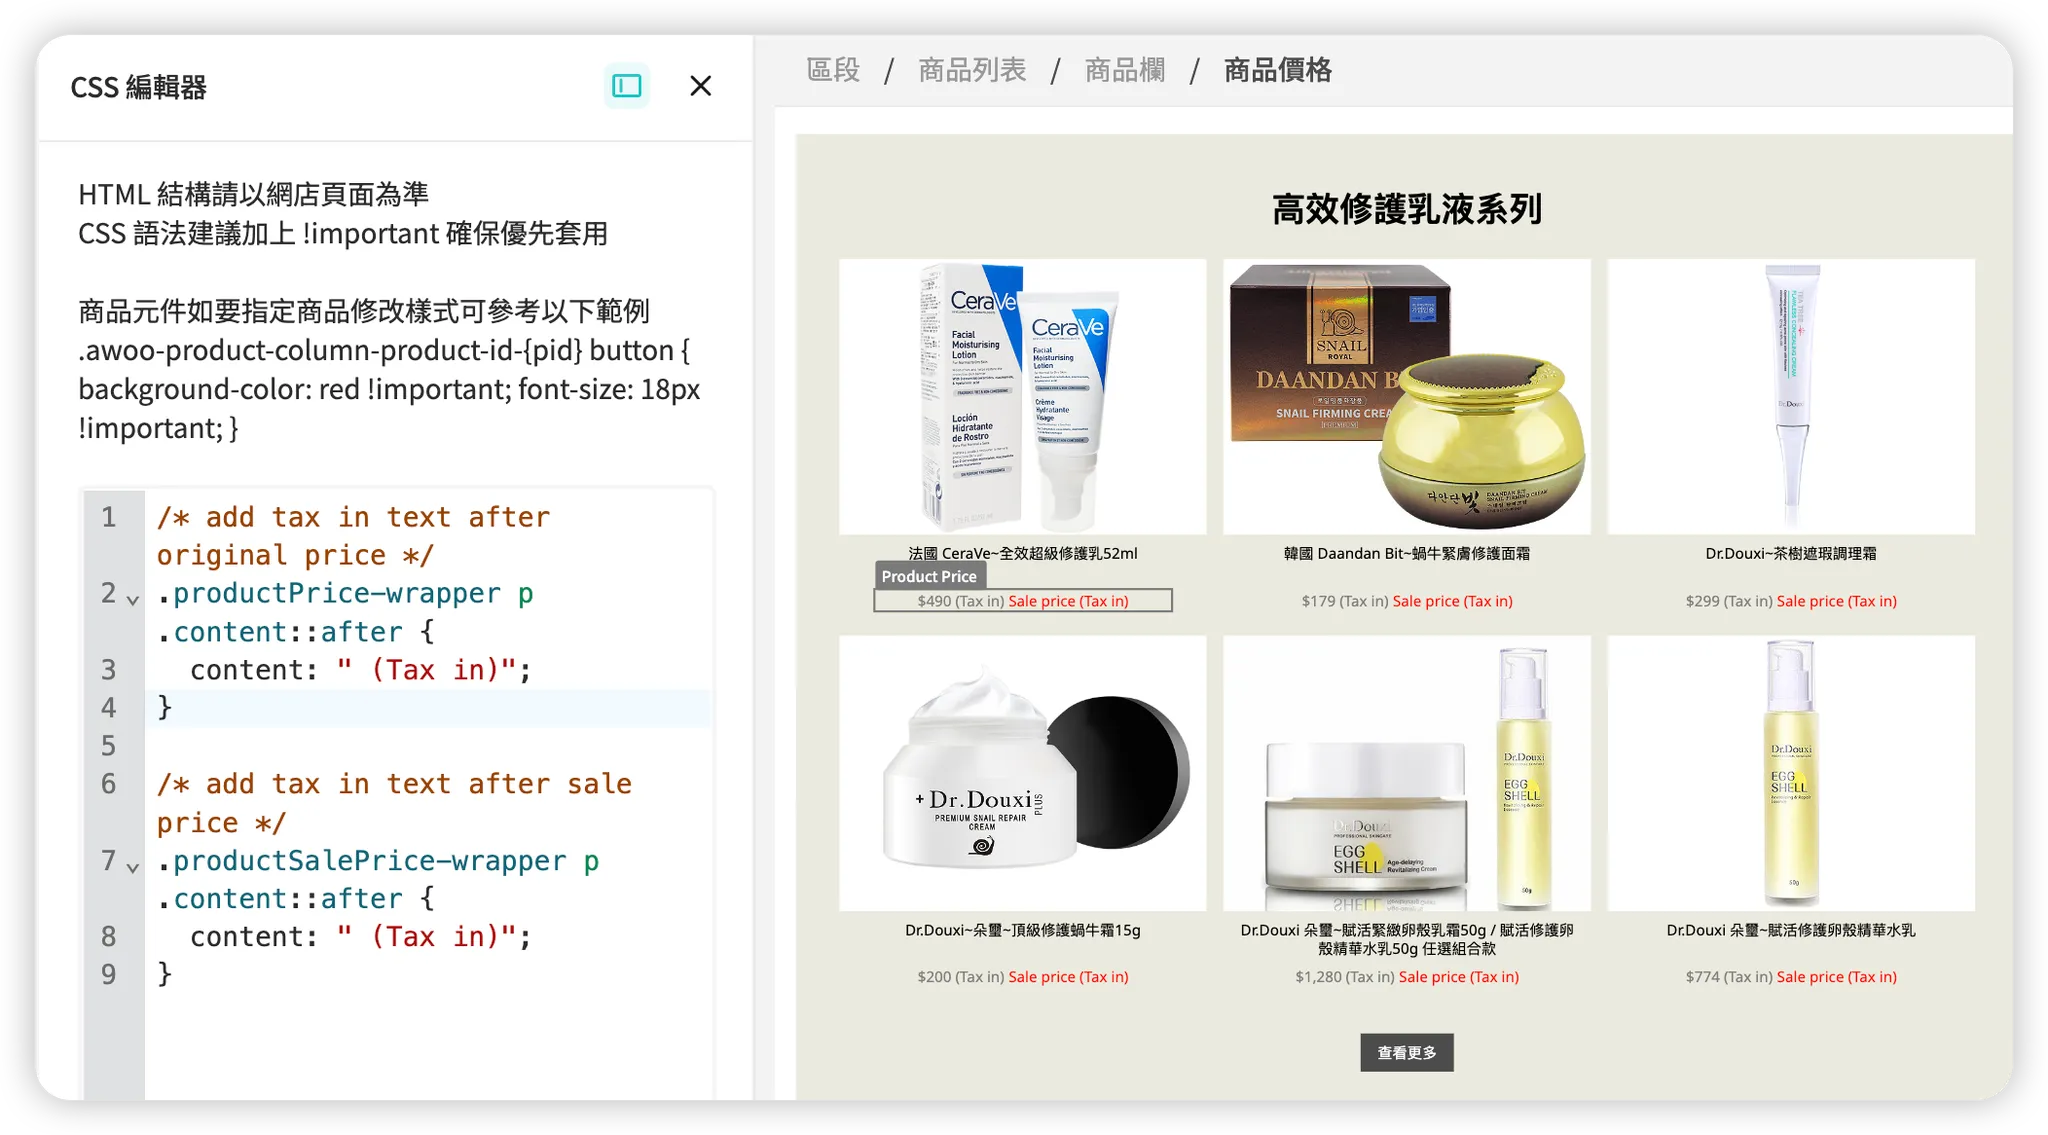
➤ Product list:在 Price 或 Sale price 後方加上「含稅」或「起」文案
-
無需自行指定元件的 Class name,請直接在 CSS editor 輸入以下語法:
/* add tax in text after original price */ .productPrice-wrapper p .content::after { content: " (Tax in)"; } /* add tax in text after sale price */ /* if not every pid has sale price, do not use this code to prevent accidental exposure */ .productSalePrice-wrapper p .content::after { content: " (Tax in)"; } -
效果預覽:
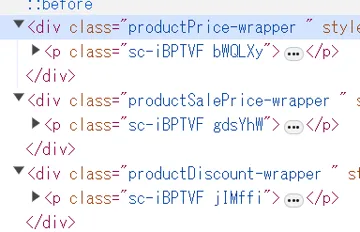
注意事項:
- 所有 Product list 的商品價格元件的
<div>區塊,都有著下列共通的 class name:
- Price:
productPrice-wrapper- Sale price:
productSalePrice-wrapper- Discount:
productDiscount-wrapper- 但這些
<div>區塊下層的<p>區塊的 class name 就是隨機生成了,因此如果要控制這些元件,建議使用上述的 class name
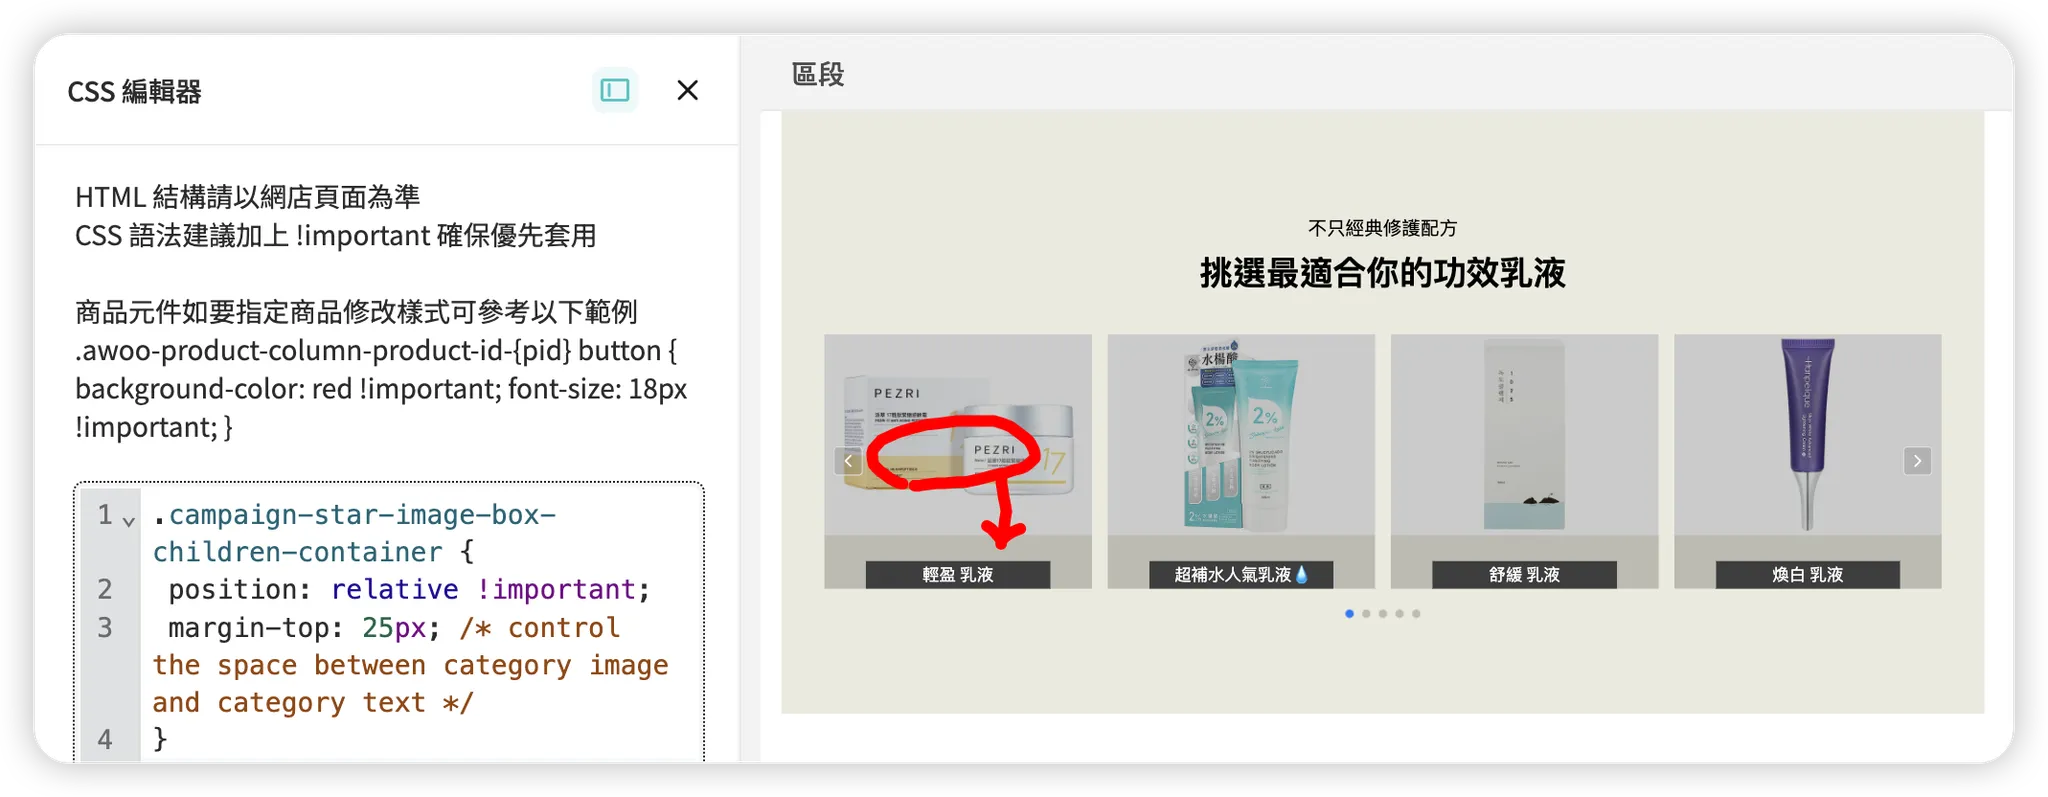
➤ Category list:把 Category text 的文字移到 Category image 外側下方
-
無需自行指定元件的 Class name,請直接在 CSS editor 輸入以下語法:
.campaign-star-image-box-children-container { position: relative !important; margin-top: 25px; /* control the space between category image and category text */ } -
效果預覽:
注意事項:
- 這個語法只是改變 Category text 的顯示位置,並不能把 Text 元件變身成 Button 元件
- 因此這時的 Category text:
- 不會像 Category button 一樣,有 hover/clicked 狀態,或調整按鈕寬高
- 不會像 Category button 一樣,可以快速設定連結,必須要到每個 Category text 的文字編輯器裡,手動插入連結
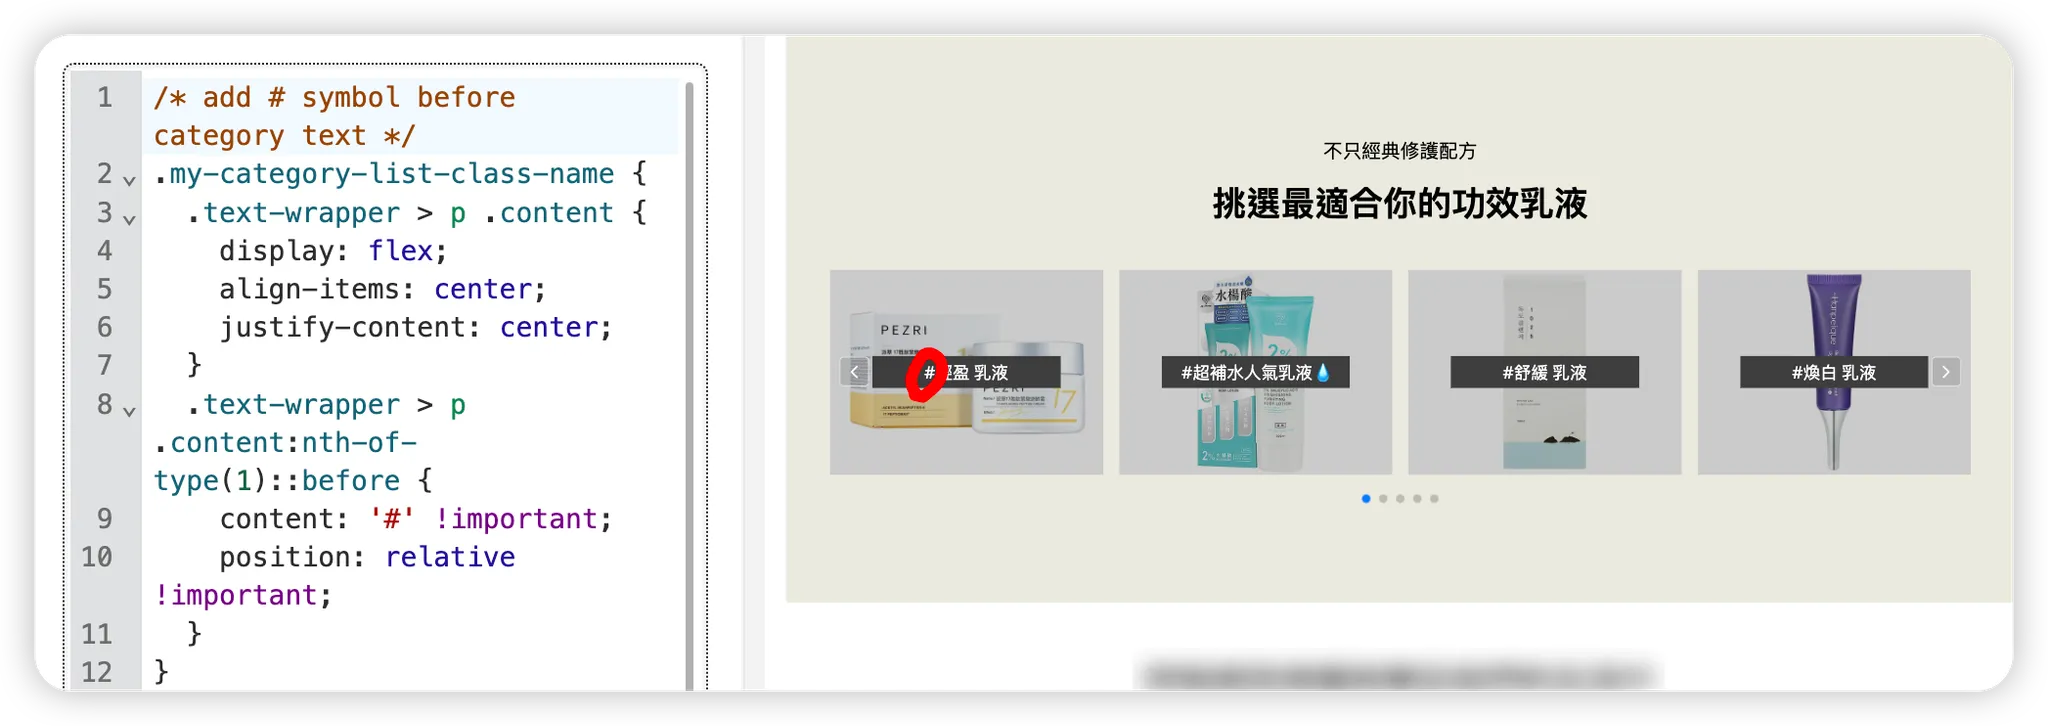
➤ Category list:在所有 Category text 文案前方加上「#」符號
-
需要先幫目標 Category list 命名 Class name,再到 CSS editor 輸入下面這段語法:
注意注意,不是在 Category text 這層,而是整個 Category list 這層喔!
/* add # symbol before category text */ /* remember to change "my-category-list-name" to your class name */ .my-category-list-name { .text-wrapper > p .content { display: flex; align-items: center; justify-content: center; } .text-wrapper > p .content:nth-of-type(1)::before { content: '#' !important; position: relative !important; } } -
效果預覽:
➤ 所有文字:調整行高和字距
-
無需自行指定元件的 Class name,請直接在 CSS editor 輸入以下語法:
* { line-height: 1.62em !important; letter-spacing: 0.1px !important; } -
效果預覽:

➤ 所有文字:套用 Campaign Star 尚未支援的字體
-
無需自行指定元件的 Class name,請直接在 CSS editor 輸入以下語法:
/* apply Microsoft JhengHei first, if fail then fall back to Noto Sans */
* {
  font-family: "Microsoft JhengHei", "Noto Sans" !important;
}
注意事項:
- 大大大前提:您的網站(或訪客的裝置系統)有支援這個字體! 此時雖然 AMP 後台的編輯器畫布無法吃到字體,前往網店的預覽頁或正式頁查看,就會正常顯示了
- 如果您的網站(或訪客的裝置系統)不支援這個字體,這段語法不僅不會發生作用,甚至可能把原本在 AMP 後台編輯器右側面板的字體設定全部重置掉
➤ 所有超連結文字:調整預設連結文字顏色&移除底線效果
-
無需自行指定元件的 Class name,請直接在 CSS editor 輸入以下語法:
/* remove underline from hyperlink text and change hyperlink default color */ a { color: red; text-decoration: none; } -
效果預覽:
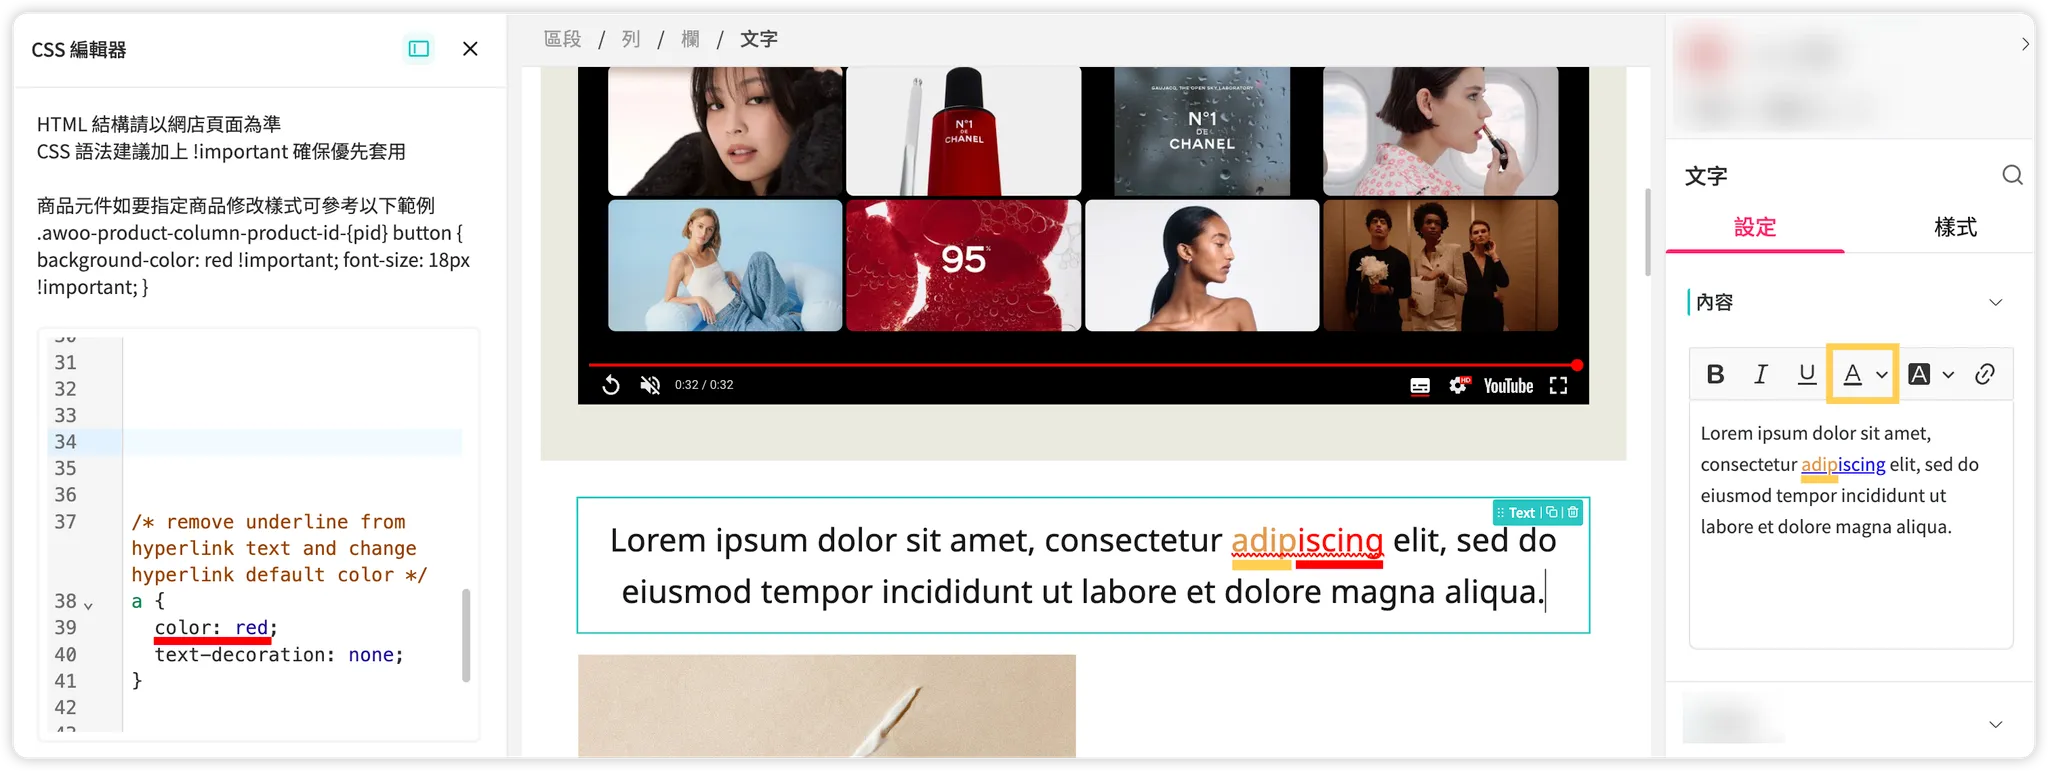
注意事項:
- 用 CSS 設定的連結文字顏色 (red),套用優先度會低於用「工具列 > 文字顏色」設定的連結文字顏色 (orange),請參見上圖
Updated 5 months ago
Did this page help you?