
CSS Editor and Common Syntax
Each campaign page has an independent CSS editor to customize advanced styles for the page.
🚪 Entry Point
Access it from the toolbar in the left sidebar after entering the page editor of a campaign page from the campaign management list.
🛠️ Usage
- Use the HTML structure of the SDK webstore page as reference, DO NOT refer to the HTML of the preview canvas in the backend editor🚫
- CSS class name designation:
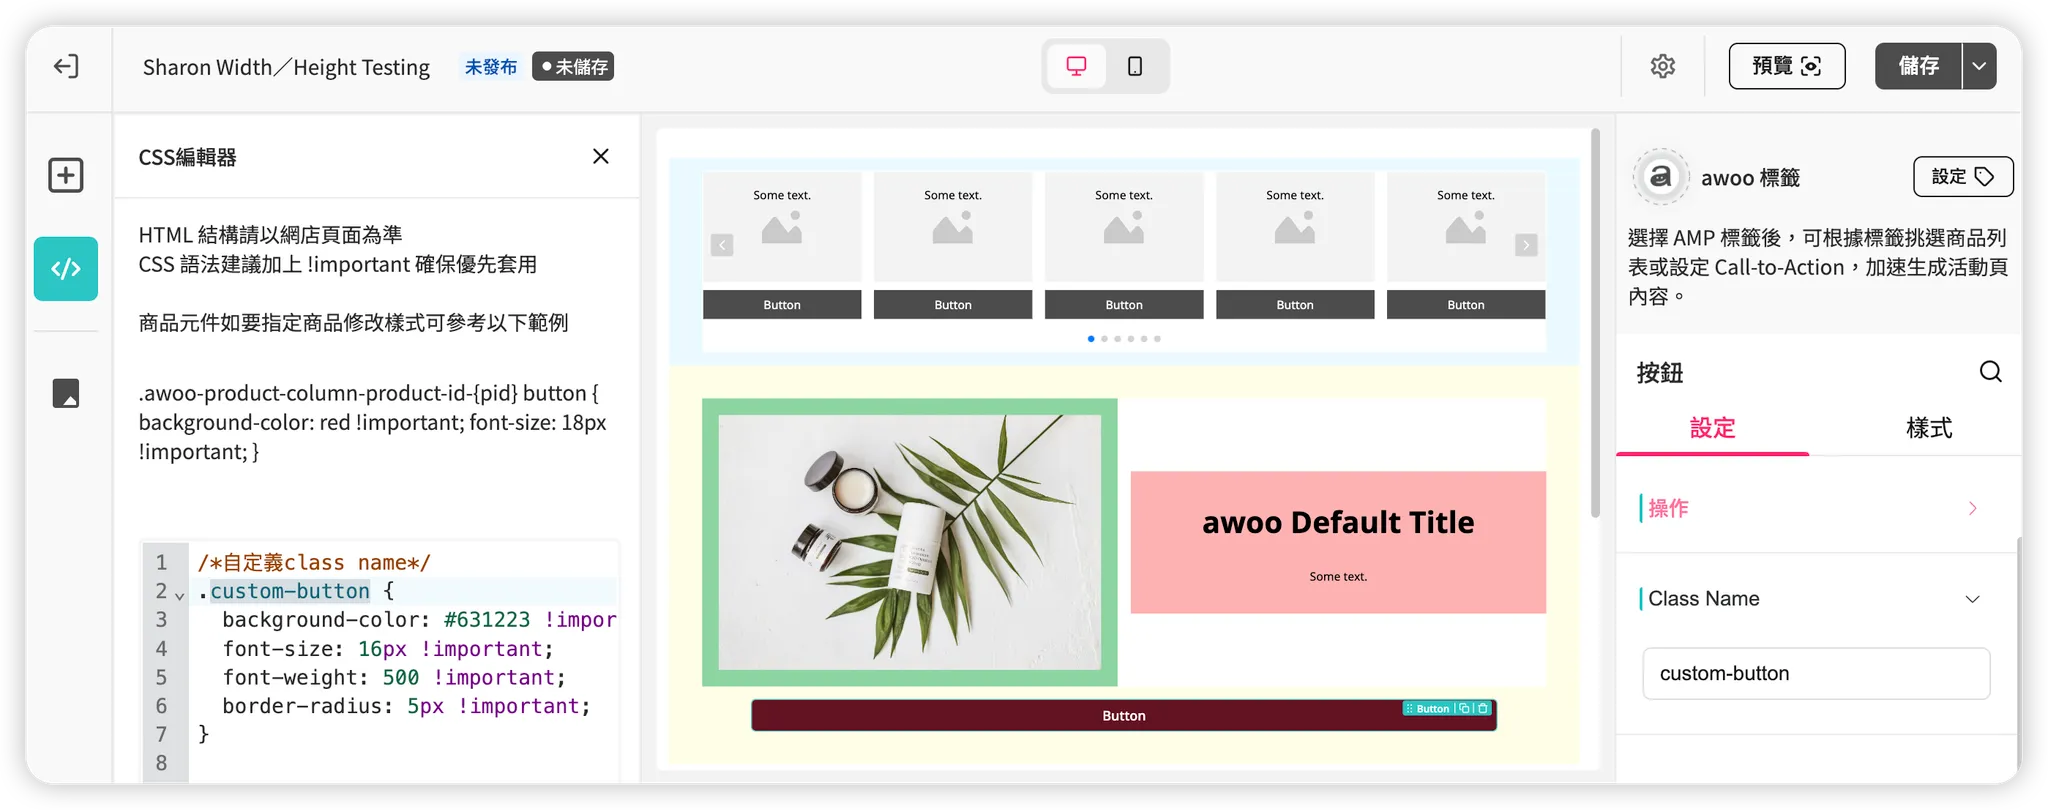
- You can specify it in the "class name" field in the component settings panel on the right side of the backend editor
- To style a specific product in the Product list component, use the system-designated class name:
awoo-product-column-product-id-{pid}
- When the same component (class name) has different style settings in the CSS editor vs. the component settings panel on the right side, the frontend will display according to the CSS editor settings
- Example CSS Code:
/*custom class name*/
.custom-button {
  background-color: #631223 !important;
  font-size: 16px !important;
  font-weight: 500 !important;
  border-radius: 5px !important;
}

/*specific pid in product list*/
.awoo-product-column-product-id-NF0A5J5NHCZ button {
  background-color: red !important;
  font-size: 18px !important;
}
.awoo-product-column-product-id-NF0A5J5NHCZ h5 {
  color: blue !important;
  font-size: 18px !important;
}
💡 Common CSS Syntax
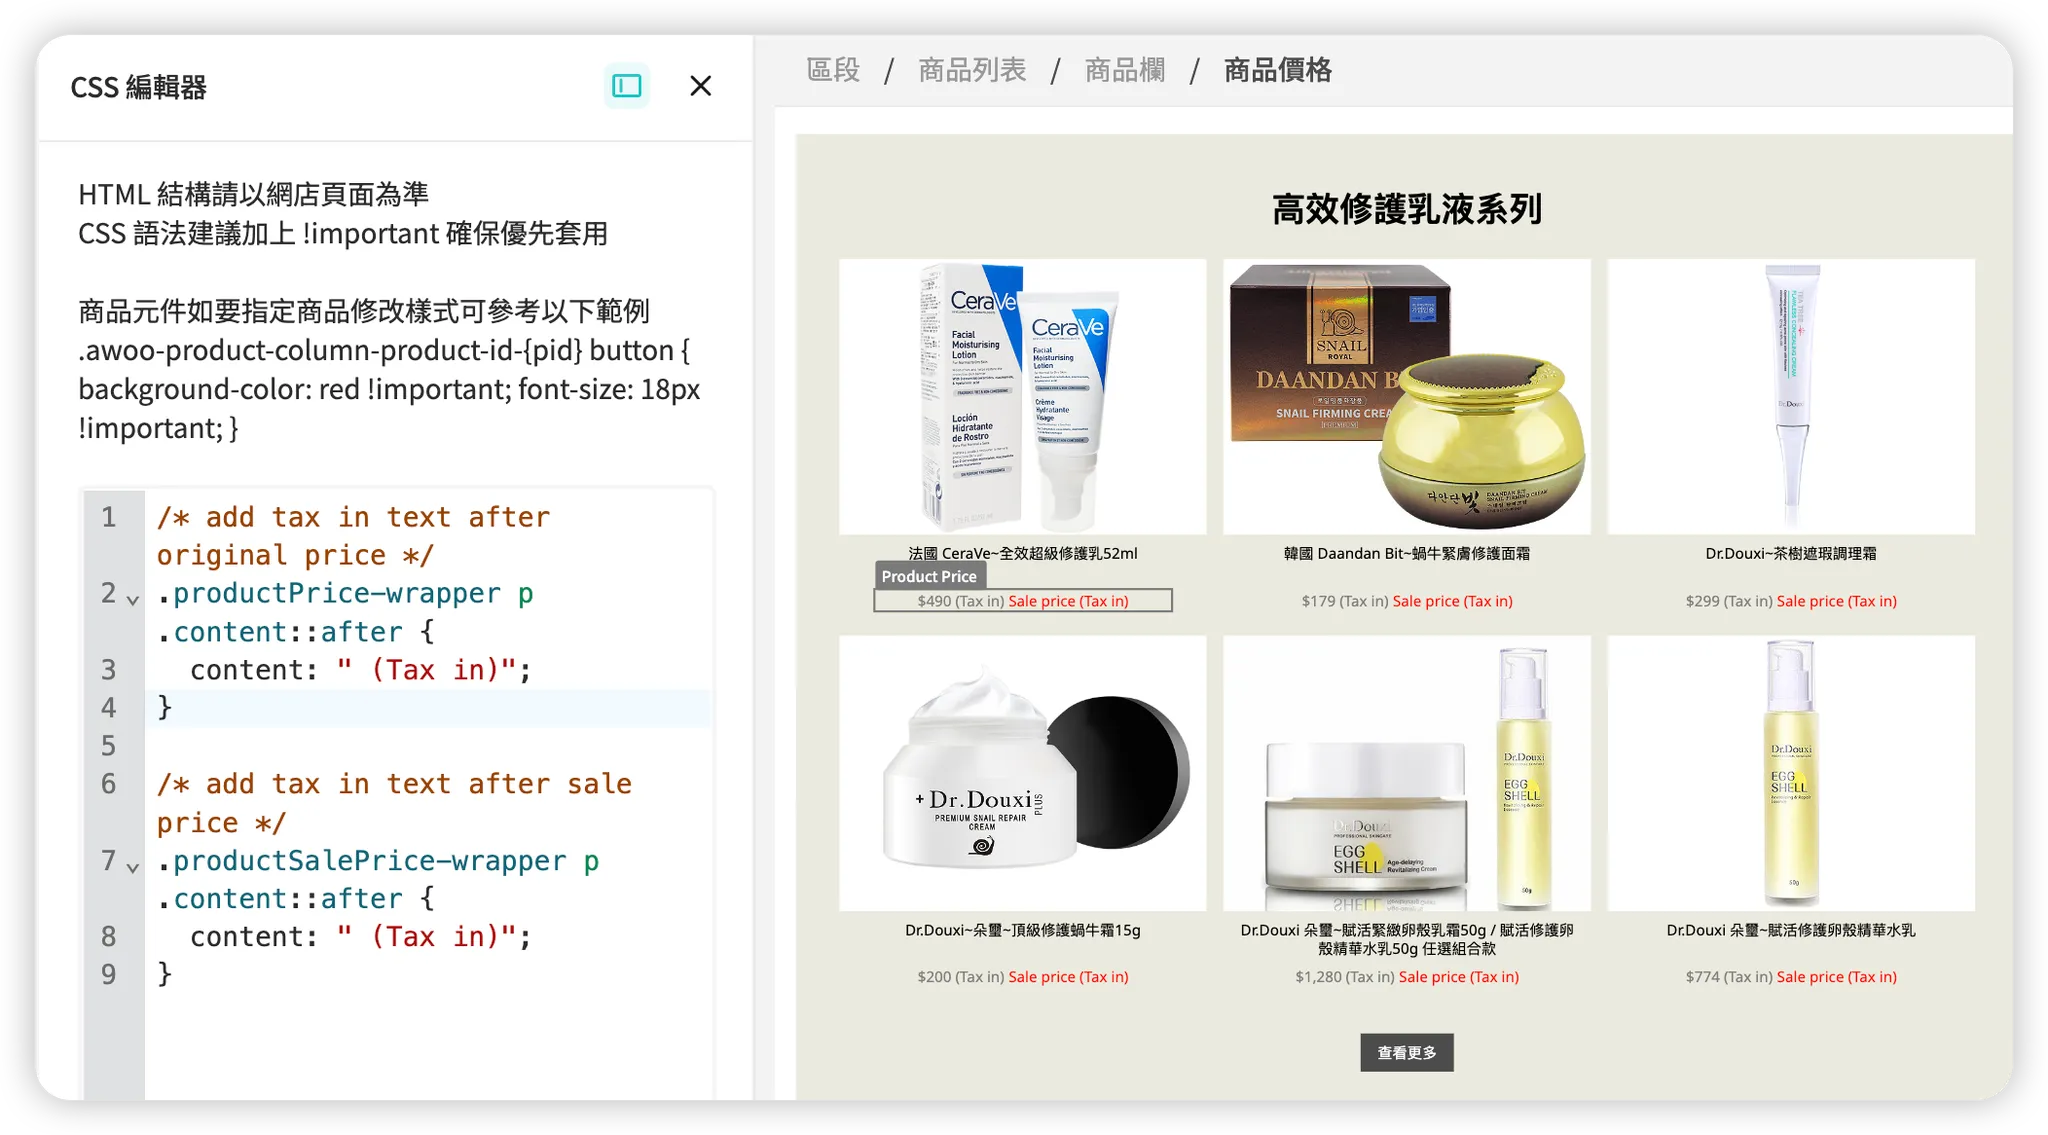
➤ Product list: Add "Tax in" or "Starting from" text after Price or Sale price
-
No need to specify a Class name for the component, just enter the following syntax directly in the CSS editor:
/* add tax in text after original price */ .productPrice-wrapper p .content::after { content: " (Tax in)"; } /* add tax in text after sale price */ /* if not every pid has sale price, do not use this code to prevent accidental exposure */ .productSalePrice-wrapper p .content::after { content: " (Tax in)"; } -
Preview:
Notes:
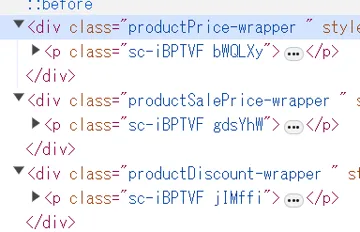
- All product price components in the Product list have the following common class names for the
<div>blocks:
- Price:
productPrice-wrapper- Sale price:
productSalePrice-wrapper- Discount:
productDiscount-wrapper- However, the class names of the
<p>blocks under these<div>blocks are randomly generated, so it's recommended to use the above class names to control these components
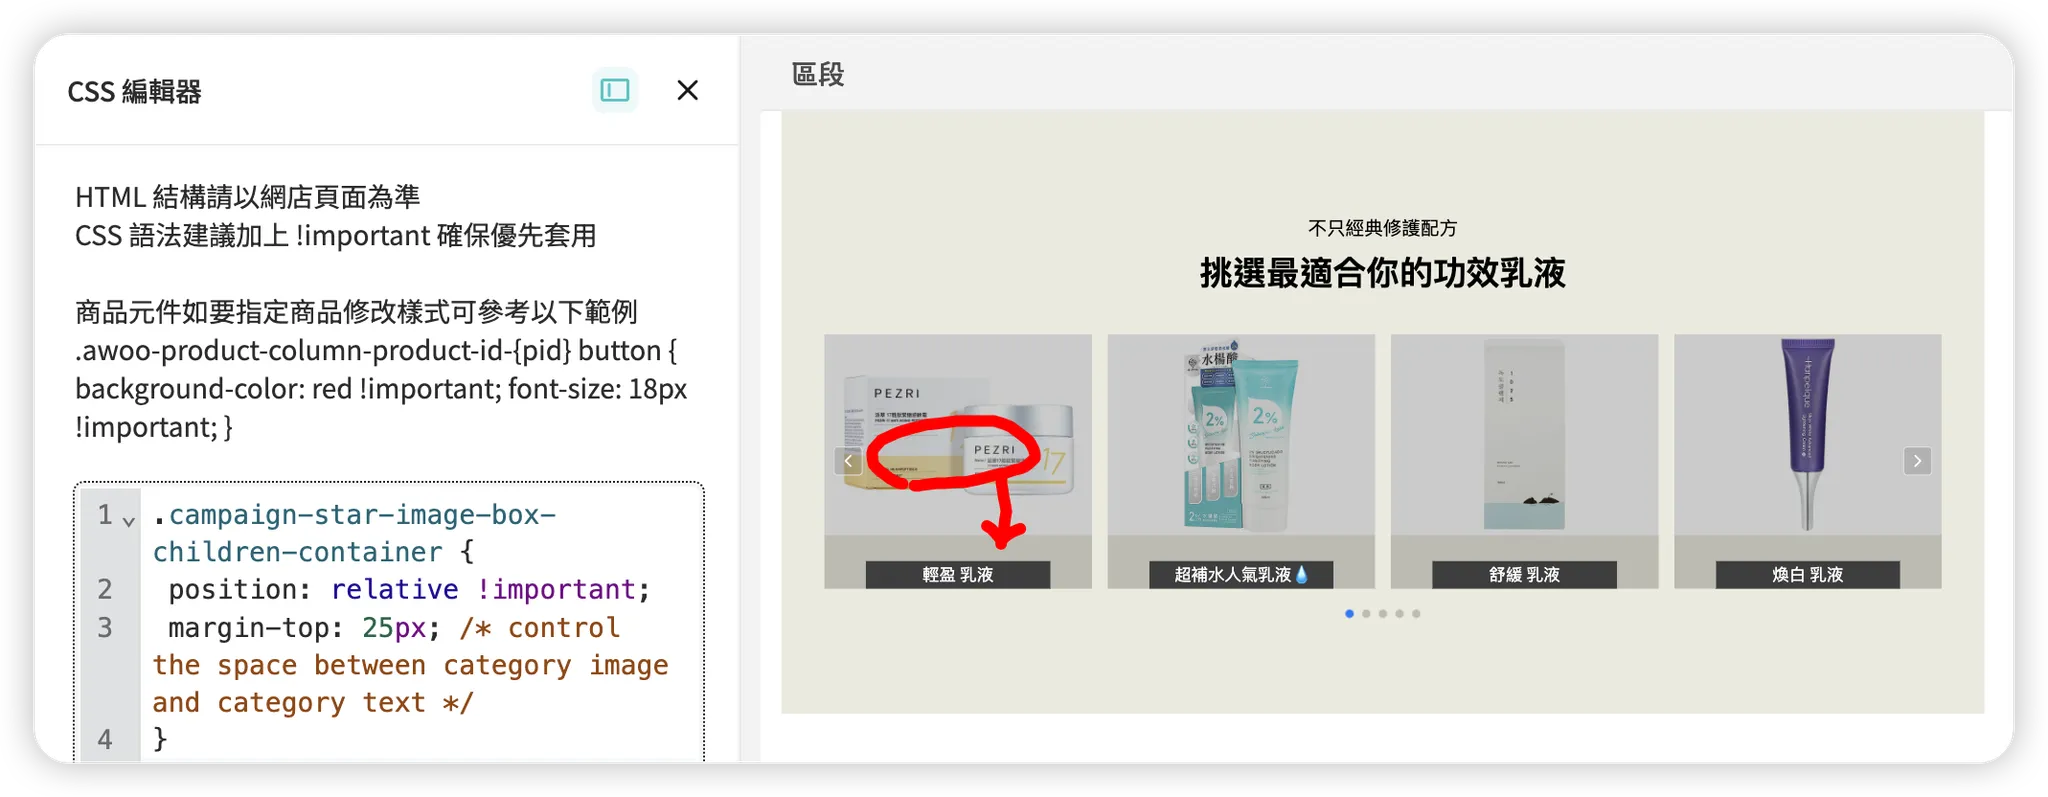
➤ Category list: Move Category text to below the Category image
-
No need to specify a Class name for the component, just enter the following syntax directly in the CSS editor:
.campaign-star-image-box-children-container { position: relative !important; margin-top: 25px; /* control the space between category image and category text */ } -
Preview:
Notes:
- This syntax only changes the display position of Category text, it cannot transform the Text component into a Button component
- Therefore, the Category text at this time:
- Will not have hover/clicked states like Category button, or adjustable button width/height
- Will not allow quick link settings like Category button, you must manually insert links in each Category text's text editor
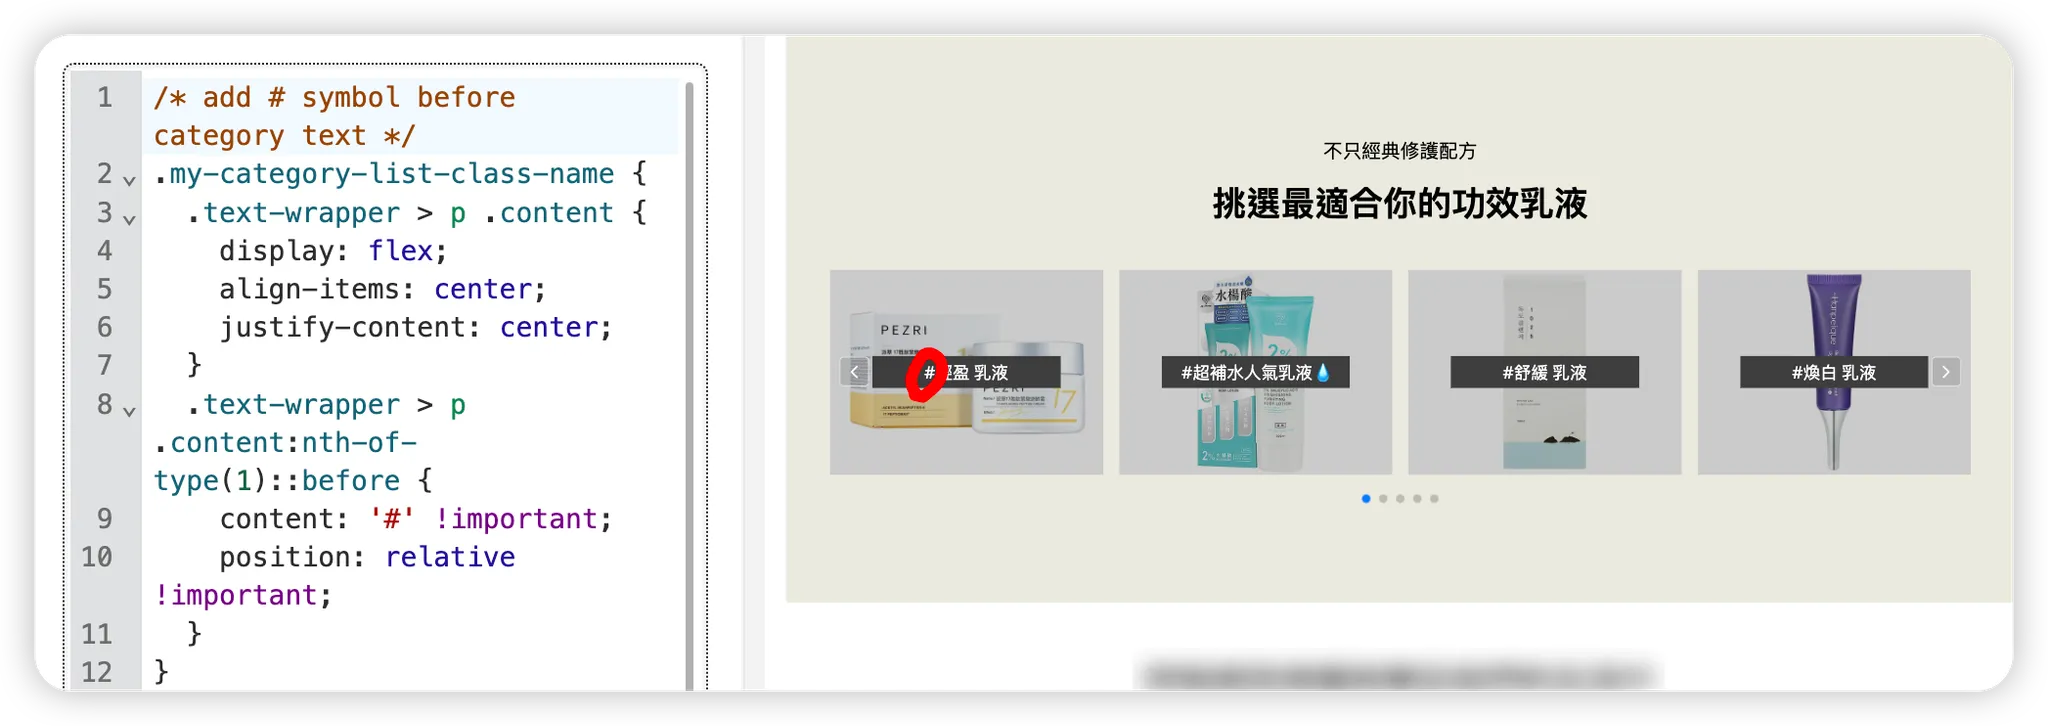
➤ Category list: Add "#" symbol before all Category text
-
You need to first assign a Class name to the target Category list, then enter the following syntax in the CSS editor:
Note: This is at the Category list level, not the Category text level!
/* add # symbol before category text */ /* remember to change "my-category-list-name" to your class name */ .my-category-list-name { .text-wrapper > p .content { display: flex; align-items: center; justify-content: center; } .text-wrapper > p .content:nth-of-type(1)::before { content: '#' !important; position: relative !important; } } -
Preview:
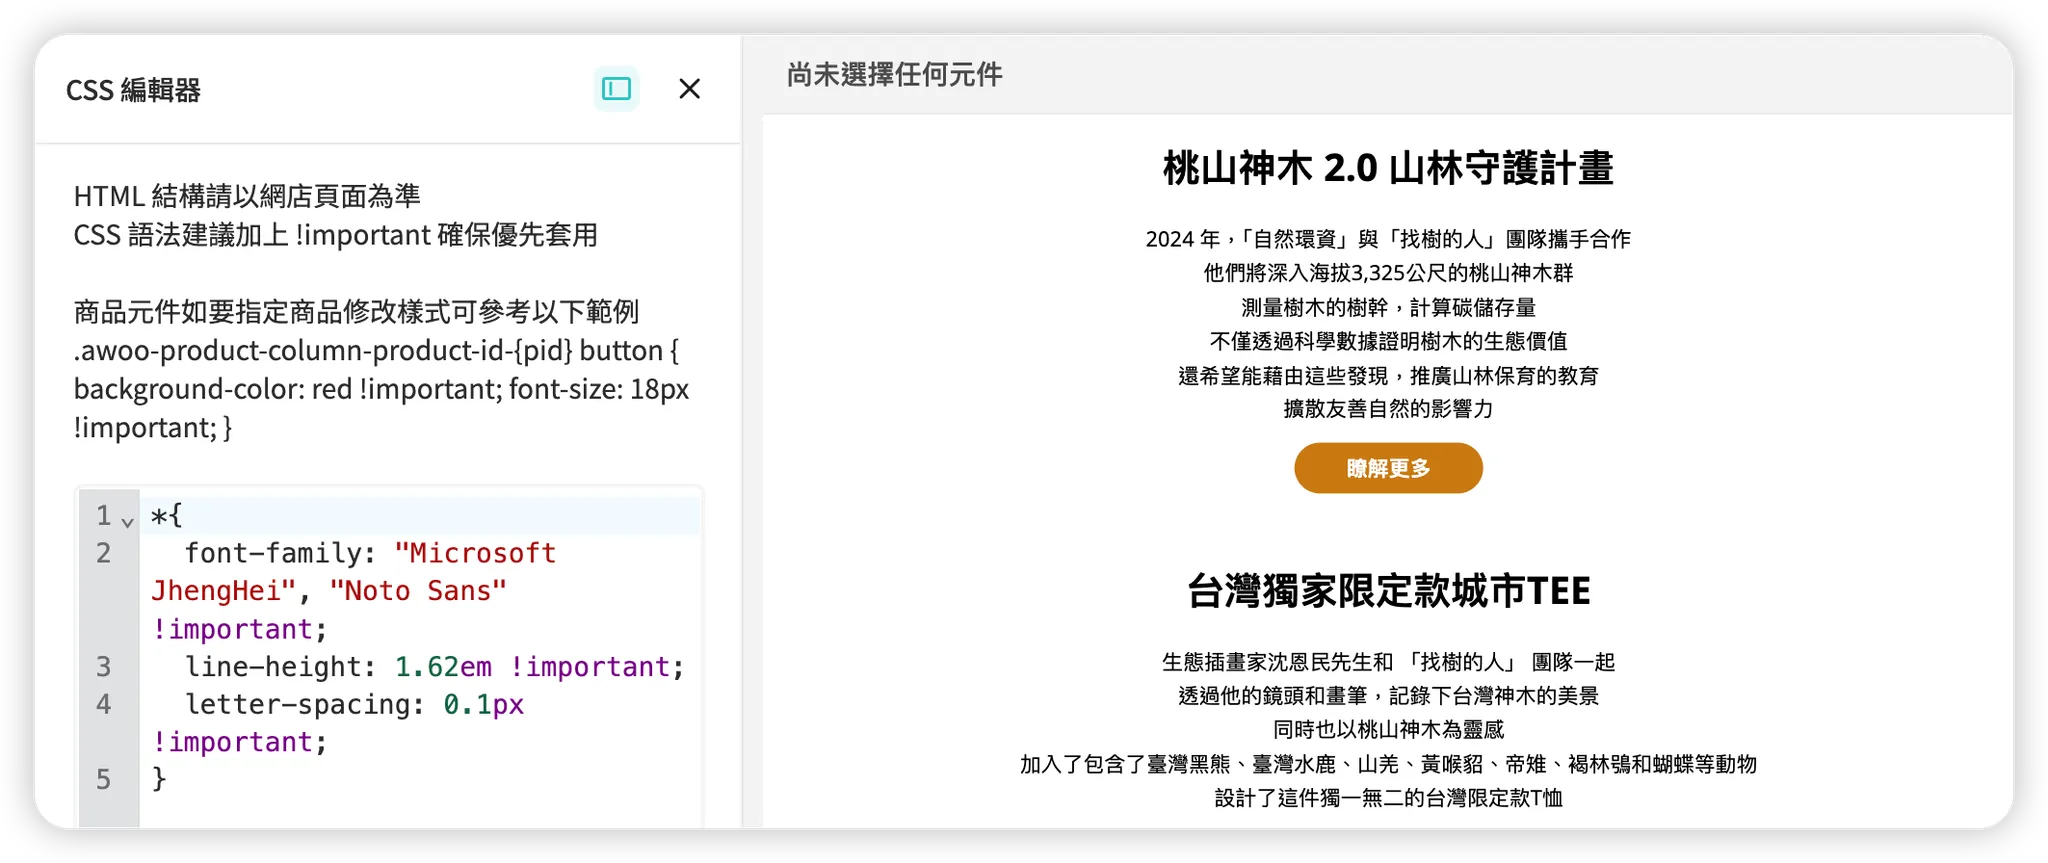
➤ All text: Adjust line height and letter spacing
-
No need to specify a Class name for the component, just enter the following syntax directly in the CSS editor:
* { line-height: 1.62em !important; letter-spacing: 0.1px !important; } -
Preview:
➤ All text: Apply fonts not yet supported by Campaign Star
-
No need to specify a Class name for the component, just enter the following syntax directly in the CSS editor:
/* apply Microsoft JhengHei first, if fail then fall back to Noto Sans */
* {
  font-family: "Microsoft JhengHei", "Noto Sans" !important;
}
Notes:
- Important prerequisite: Your website (or visitor's device system) must support this font! Although the AMP backend editor canvas cannot display the font, it will display normally when you view the preview or live page on the webstore
- If your website (or visitor's device system) does not support this font, this syntax will not only have no effect, but may even reset all the font settings in the right panel of the AMP backend editor
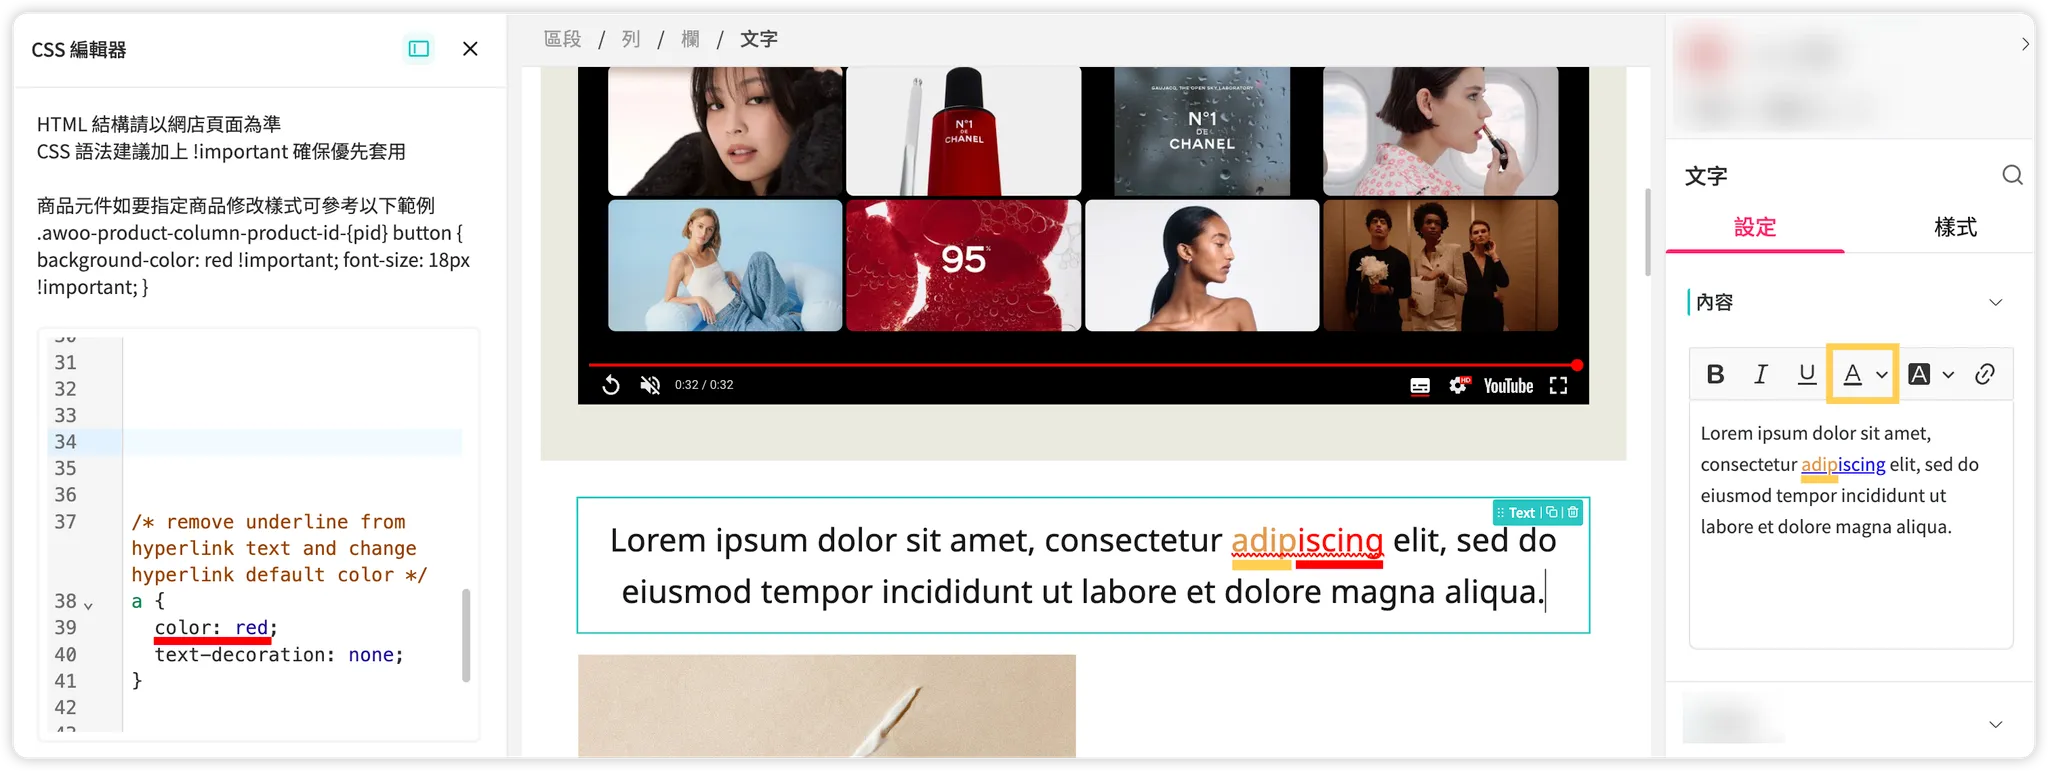
➤ All hyperlink text: Adjust default link text color & remove underline effect
-
No need to specify a Class name for the component, just enter the following syntax directly in the CSS editor:
/* remove underline from hyperlink text and change hyperlink default color */ a { color: red; text-decoration: none; } -
Preview:
Notes:
- The link text color (red) set with CSS has a lower priority than the link text color (orange) set with "Toolbar > Text Color", as shown in the image above
Updated 8 months ago